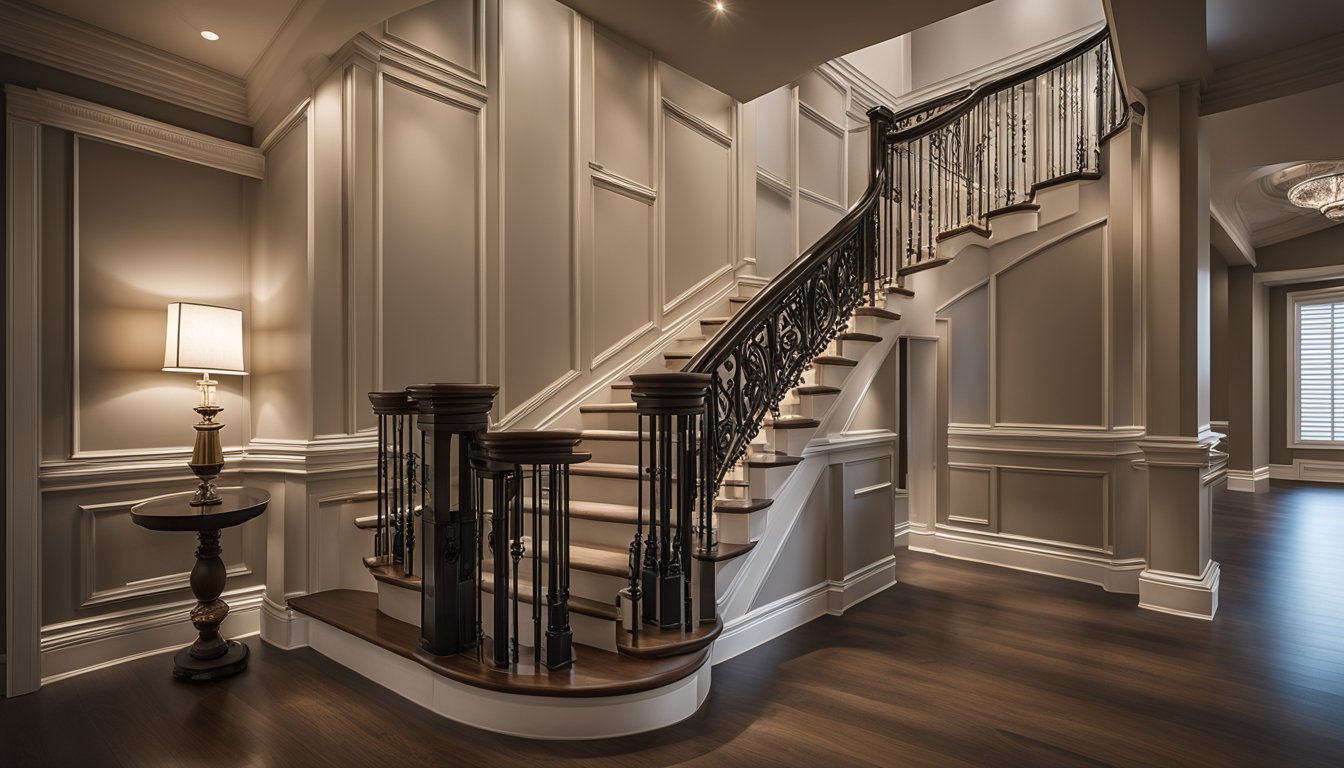
Mastering Trim and Carpentry Skills
If you do it right, trimming your walls and floors can transform the entire aesthetic of your house. This guide dives into the tricks and techniques that turn a basic space into a refined and elegant home. From the essential tools and materials to the advanced skills needed for intricate projects, you’ll learn how to master the art of trim carpentry.
Whether you’re a beginner looking to tackle your first project or an experienced carpenter aiming to refine your skills, this comprehensive guide has something for everyone. We’ll cover everything from basic interior trim types and purposes to specialized projects that can elevate the look of any room. Get ready to explore the world of trim carpentry and discover how to enhance your home with beautiful details.
The Foundations of Trim Carpentry
At its core, trim carpentry is about adding the final touches that complete a room’s appearance. By skillfully trimming walls and floors, you can dramatically alter the visual appeal of your space. This section lays the groundwork for understanding these changes, equipping you with the knowledge to start your trim carpentry journey. If you need help with trim in the state of Texas, you can get in touch with Brown Contracting for a remarkably precise finished product!
What Is Trim Carpentry?
Trim carpentry focuses on the detailed work that gives rooms a finished look. It involves adding decorative and functional elements like baseboards, crown moldings, and door casings to walls and floors. This craft not only enhances the aesthetics but also covers seams where different surfaces meet, showcasing the importance of precision and attention to detail.

Distinguishing Between Finish and Trim Carpentry
While often used interchangeably, finish and trim carpentry have distinct roles in the construction and design of a home. Trim carpentry specifically refers to the installation of moldings and other elements that add to the room’s visual appeal. It’s a subset of finish carpentry, which includes a broader range of tasks aimed at completing the interior and exterior details of a building.
Interior Trim Basics
Understanding the basics of interior trim is crucial for anyone looking to enhance their home’s design. Interior trim includes various elements like baseboards, door frames, window casings, and crown molding, each serving a unique purpose in home aesthetics and functionality. This foundation is essential for creating cohesive and visually appealing spaces.
View a slideshow about some trim carpentry secrets here: https://www.finehomebuilding.com/2011/10/24/7-trim-carpentry-secrets
Introduction to Interior Trim Types and Purposes
Interior trim serves both decorative and practical purposes, ranging from concealing the gaps between walls and floors to adding architectural interest. Common types include baseboards, which provide a transition between walls and floors; crown molding, which adds elegance at the junction of walls and ceilings; and casings around doors and windows to define openings and enhance visual appeal. Understanding these types can help you choose the right trim for your project.
Essential Tools and Materials for Trim Carpentry
Success in trim carpentry begins with the right tools and materials. From saws and hammers to nails and adhesives, selecting the appropriate items is crucial for achieving precise cuts and secure installations. This section will guide you through choosing the tools that ensure efficiency and precision in your trim projects.
Selecting the Right Tools for Precision and Efficiency
In trim carpentry, the quality of your work heavily depends on the tools and materials you use. Essential carpentry tools include tape measures for accurate measurements, saws for precise cuts, and levels to ensure everything is perfectly aligned. Additionally, choosing the right materials, from durable wood trim to high-quality paint, can significantly impact the final look and longevity of your project.
Advanced Techniques and Tips
As you become more comfortable with basic trim carpentry, exploring advanced techniques can help elevate your projects. This section delves into specialized skills and tips for mastering complex installations, like crown molding and wainscoting, ensuring your work stands out with professional-quality finishes.
Mastering Crown Molding and Baseboard Installation
Installing crown molding and baseboards adds a polished look to any room, running parallel to the floor and ceiling to create a smooth transition between surfaces. Mastering these installations requires understanding how to measure, cut, and fit each piece accurately, ensuring a cohesive look throughout the room.
Cutting Techniques for Perfect Fit
Perfecting the art of cutting is essential for installing trim, especially for elements like chair rail, where precision is key. Learning to measure correctly and make precise cuts ensures tight joints and a seamless appearance. Techniques such as coping and mitering are vital skills for achieving that perfect fit, regardless of the room’s angles or irregularities.
The Art of Window and Door Casings
Window and door trim plays a critical role in the overall look of a room, framing openings and adding architectural detail. Achieving a professional finish requires precise measuring, cutting, and installation, ensuring that casings fit flush against walls and openings, enhancing both the functionality and beauty of your space.

Achieving Seamless Aesthetics
The key to seamless window and door casings lies in careful planning and execution. Accurate measurements and precise cuts are crucial for tight joints that blend smoothly with the surrounding architecture. By paying attention to detail, you can create a flawless finish that elevates the aesthetic appeal of any room.
Expert Advice on Wainscot and Paneling
Adding wainscot or paneling can dramatically change the look of a room, offering both sophistication and protection to walls. Whether you’re installing simple beadboard or more intricate designs, the right carpentry skills are essential. This section provides expert advice on measuring, cutting, and installing paneling to achieve a professional look.
Enhancing Room Elegance with Paneling
Paneling, paired with a chair rail, can significantly enhance the elegance of a room. Proper installation requires carpentry skills to ensure panels fit precisely between the baseboard and chair rail, creating a cohesive and attractive design. With attention to detail and the right techniques, you can transform any room into a space of refined beauty.
Specialty Trim Carpentry Projects
When you dive into specialty trim carpentry projects, you’re not just adding details to a house; you’re transforming it. These projects, like crafting elegant mantels and implementing coffered ceilings, require a blend of skill, creativity, and an eye for detail. They elevate the aesthetic of your home, making ordinary spaces extraordinary. Whether you’re a seasoned carpenter or a dedicated DIY enthusiast, mastering these specialty projects can change the way you view interior design.
Crafting Elegant Mantels and Fireplace Surrounds
Mantels and fireplace surrounds are more than just parts of a room; they’re centerpieces that draw attention. Drawing inspiration from classical architecture can help you design a mantelpiece that stands out. Elements like pilasters, friezes, and cornices can add a touch of elegance and grandeur to any living space. With the right design, your fireplace can become a stunning focal point that reflects your style and enhances your home’s overall charm.
Design and Installation Tips
When designing and installing a mantel or fireplace surround, there are several rules of thumb to keep in mind. First, ensure your design complements the room’s existing aesthetic. Consider the proportions carefully; the mantel should fit the space without overwhelming it. Use quality materials that will not only look beautiful but will also stand the test of time. Finally, precision is key during installation. A perfectly aligned and securely installed mantel will look professional and last longer.
Implementing Coffered Ceilings for Dramatic Effect
Coffered ceilings can transform a plain ceiling into a masterpiece, creating an illusion of height and sophistication. This architectural feature divides a large space into intimate sections, adding character and luxury. Whether made from solid wood or alternative materials like painted MDF, coffered ceilings require careful planning and execution to ensure each section fits tightly and looks seamless.
Planning and Execution Strategies
Implementing coffered ceilings starts with detailed planning. Measure your space carefully and sketch out the design to ensure each beam will fit tightly. Consider the room’s layout and how the coffered ceiling will enhance its overall appearance. Choose materials that suit your budget and style, and be prepared for a step-by-step installation process that may require patience and precision. With the right approach, your coffered ceiling will add drama and elegance to any room.

Trim Carpentry Challenges and Solutions
Trim carpentry, while rewarding, comes with its fair share of challenges. From removing old trim without damaging the walls to achieving a flawless finish on new installations, each step requires skill and knowledge. Fortunately, with the right techniques and a bit of expert advice, overcoming these obstacles is entirely possible, ensuring your trim work enhances the beauty of your home.
Best Practices for Trim Removal and Repair
Removing old trim can be daunting, but it doesn’t have to result in damaged walls. Using the proper tools and techniques, such as gently prying away the trim with a putty knife and using a heat gun to loosen paint, can minimize harm. Repairing any damage before installing new trim ensures a smooth, professional finish. With patience and care, your walls can be prepared properly for the new trim, making the entire project more seamless.
Techniques to Minimize Damage and Maximize Efficiency
To efficiently remove and repair trim, start by carefully scoring the paint along the edges of the trim to prevent peeling. Use a slim pry bar to gently lift the trim away from the wall, working slowly to avoid breaking the wood. For repairs, fill holes and smooth out imperfections with wood filler, sanding the area until it’s flush with the wall. These steps will help you achieve a clean, damage-free surface for your new trim installation.
Advanced Trim Painting and Finishing Tips
Painting trim requires attention to detail to achieve a smooth, flawless finish. Preparing the surface by sanding and applying a primer is crucial for paint adhesion. Choosing the right type of paint and tools can also make a significant difference in the outcome. With careful application and the right techniques, your trim can have a professional, polished look that enhances your home’s aesthetic appeal.
Achieving Smooth and Flawless Finishes
To ensure a smooth finish on your trim, begin with a high-quality primer to seal the wood and create an even base. Lightly sand between coats to remove any imperfections. When applying paint, use a fine bristle brush or a foam roller designed for trim work to avoid brush marks. Taking your time and applying thin, even coats will result in a smooth, durable finish that brings out the beauty of your trim carpentry work.
Elevating Your Trim Carpentry Skills
Advancing your trim carpentry skills not only allows you to tackle more complex projects but also elevates the overall quality of your work. From mastering basic techniques to exploring innovative DIY projects, there’s always room for growth. Keeping up with new trends, materials, and tools can inspire fresh ideas and improve your craftsmanship, making every project better than the last.
Innovative DIY Trim Projects and Ideas
DIY trim projects offer a fantastic opportunity to practice your skills while enhancing your home. Whether you’re adding decorative molding, building a custom mantel, or installing wainscoting, there are projects for every skill level. These projects not only improve the look of your home but also give you a sense of accomplishment and the confidence to tackle even more challenging tasks. Read this article for a few finishing tips for any trim project!
From Basic to Advanced: Projects to Enhance Your Home
Starting with basic projects like simple chair rails can help you gain confidence. As your skills progress, you can move on to more advanced carpentry projects, such as coffered ceilings or custom fireplace mantels. Each project offers a chance to learn new techniques and work with different materials. With each success, you’ll find your skills—and your home’s beauty—growing by leaps and bounds.
Keeping Up with the Latest Trim Carpentry Trends
In the world of trim carpentry, trends evolve, offering new opportunities for creativity and innovation. Staying informed about the latest design trends, materials, and tools can inspire your projects and improve your techniques. Whether it’s embracing eco-friendly materials or experimenting with bold, contemporary designs, there’s always something new to explore in the realm of trim carpentry.
Materials, Techniques, and Styles
Exploring a variety of materials, from traditional wood to modern composites, can open up new possibilities for your trim projects. Adapting new techniques can also enhance the quality and efficiency of your work. Whether you’re refining your skills with classic styles or experimenting with avant-garde designs, embracing a wide range of materials, techniques, and styles will keep your work fresh and exciting.
The Final Touch: Perfecting Your Trim Carpentry Work
Trimming your walls and floors the right way can transform the entire appearance of your home. It’s about more than just adding decorative elements; it’s about crafting a cohesive look that enhances every room. By mastering the final touches in trim carpentry, you can elevate the aesthetic appeal of your spaces without compromising on quality or breaking the bank.
Tips for Saving Money Without Sacrificing Quality
Quality craftsmanship doesn’t always have to come with a high price tag. By being smart about where you invest your money and choosing the right materials, you can achieve a high-end look without emptying your wallet. It’s all about knowing which aspects of trim carpentry you can economize on and where it pays to spend a bit more for durability and appearance.
Budget-Friendly Materials and Methods
When it comes to trim carpentry, opting for budget-friendly materials and methods doesn’t mean you have to compromise on quality. Consider using medium-density fiberboard (MDF) for painted trim work as it’s less expensive than solid wood but still offers a smooth finish. For installation, using a combination of adhesives with fewer nails can save both time and money, reducing the amount of wood filler and sanding required. By shopping around for materials and employing these cost-effective techniques, you can achieve a professional-looking finish while keeping your expenses in check.
Advanced Techniques for Tight Miters and Coping Trim
Attaining tight, precise miters and coping trim is crucial for a seamless look in trim carpentry. These advanced techniques are what set apart amateur work from professional quality. By honing your skills in these areas, you can ensure that every corner and joint in your trim work looks impeccable, elevating the overall quality of your projects.
Ensuring Precision in Every Cut
To ensure precision in every cut, it’s vital to use sharp blades and make sure your tools are calibrated correctly. For miters, a compound miter saw can offer the accuracy needed for perfect angles. When coping, a coping saw allows for tight, clean cuts that fit snugly against adjacent trim. Practicing these techniques and paying close attention to detail will result in tight joints and beautiful, professional-looking finish work that truly enhances your home’s interior.
Crafting Excellence in Every Detail: A Conclusion to Trim Carpentry Mastery
Perfecting the art of trim carpentry is about mastering the subtle details that elevate the aesthetic of both interior and exterior spaces. Whether you’re working on interior trim, door casings, or custom cabinetry, understanding the ins and outs of installing trim around doors and windows, and even mastering the precise cuts for door bottoms, can transform the look of a house. Techniques for creating seamless transitions and flawless finishes are essential, not just for the beauty of custom carpentry but for the overall integrity and value of your work. As you refine your skills, remember that excellence lies in the attention to detail, ensuring that every piece of trim and every join adds to the harmonious beauty of your spaces.